How to Grow Garlic
Authored by Leah Chester-Davis
This flavor enhancer can be grown in containers on a sunny patio, in raised beds or in a garden plot.
Garlic adds such delicious flavor to numerous culinary dishes that it’s a wonder it isn’t grown in every home garden. A relative of onions and chives, garlic has been used for both culinary and medicinal purposes for centuries. It contains compounds that have anti-inflammatory properties and antioxidants that help keep our bodies healthy.
The plant produces an edible bulb that is made up of several cloves. The entire bulb can be roasted, or individual cloves can be pulled from the bulb to use in culinary dishes. Known for its flavor-enhancing properties, garlic complements numerous vegetables as a seasoning when stir-frying, sautéing, or steaming. When minced up, it elevates salad dressings, marinades, and gravies. It mellows when roasted and becomes a sublime condiment to spread on warm bread or rolls. Luckily for everyone, it is easy to grow.
About garlic
| Botanical name: | Allium sativum |
| Common name: | Garlic |
| Plant type: | Hardy perennial, member of onion family |
| Size: | 1- to 3-feet tall |
| Sun exposure: | Full sun |
| Soil type: | Fertile, well-drained soil |
| Soil pH: | Slightly acidic, 6 to 7 |
| Hardiness zones: | Numerous zones; your zone may dictate variety |
| Average first frost: | Varies by region |
| Average last frost: | Varies by region |
| Container friendly: | Yes |
| Beginner friendly: | Yes |
Growing

The best time to plant garlic is in the fall, at least six to eight weeks before the ground freezes. It benefits from cooler temperatures and planting in the fall will give it time for better root development and vegetative growth. Bulb growth and development will begin when temperatures warm in the spring and the days are longer. Garlic prefers full sun and moist, well-drained soil with a pH between 6 and 7.
As with many other food crops, garlic likes soil that has been improved with organic matter such as shredded leaves or compost. The richer the soil in organic matter, the less fertilizer you will need. You can plant garlic into soil beds or in containers.
If you are in a warmer climate that doesn’t see temperatures below 40 degrees for a couple of months, or if you plant garlic in the spring, you can trick the bulbs by storing them in the refrigerator for eight weeks before planting. This subjection of the bulb to cold weather or refrigeration is called vernalization and results in proper bulb formation. While vernalization before spring planting may result in garlic, the best bet is to plant in the fall for higher yields. If planting in the spring, plant as early as possible.
Terms you will likely come across when purchasing from seed catalogs or from a garden center or nursery are softneck and hardneck.
- Softneck garlic is the kind most often found in the grocery stores. It rarely produces a flower stalk, hence its name. It also doesn’t peel as easily as hardneck types. Because it doesn’t have the hard flower stalk or scape, it can be easier to braid. Softneck types typically last several months when cured and stored properly. They seem to perform best where winters are mild and the growing season is long.
- Hardneck garlic has a flower stalk called a scape. The garlic is easy to peel and may have a shorter storage life. Some people use the scapes in addition to the bulbs in culinary dishes. Hardneck types seem to grow best where winter is long and the growing season is short.
Since garlic takes a while to grow, plant it in an area where it will not be disturbed by other gardening activities.
Planting

Garlic is characterized by a large bulb made up of many cloves that can be separated. Rather than planting seed, garlic is started in the garden with cloves. For bed preparation, choose a spot in the garden that has not had onions the past three years.
Till the garden soil until it is loose and friable and add plenty of organic material.
If you have had your soil tested, follow recommendations to improve soil fertility. In the absence of a soil test, Georgia Extension recommends applying 1 pound of 10-10-10 fertilizer per 100 square feet in the fall and working it into the garden before planting or use an organic source such as blood meal. Apply another 1 to 1.5 pounds of 10-10-10 in early spring.
Just before planting, separate “seed bulbs” into individual cloves.
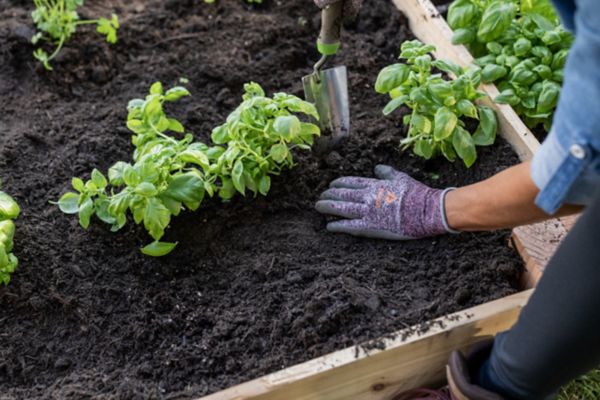
Place an unpeeled garlic clove into the soil about 1-inch to 3-inches deep. If in a colder climate, plant them 3-inches deep. Make sure the pointed side is up and the stem or basal end is in the soil. Each clove needs to be spaced about 6-inches apart. If you are planting in rows, make sure the rows are about 18-inches apart.
Cover with soil and water thoroughly.
Before winter, cover with a 4-inch layer of leaf or straw mulch to help protect the area and minimize soil temperature fluctuations in cold temperatures. In the spring, remove the mulch, except for a thin layer. When garlic shoots appear in the spring and are several inches tall, add straw or pesticide-free grass clippings around the plants to help control weeds and to add nitrogen.
Watering
- Water evenly and consistently, especially in spring and summer. Water needs will be about 1 inch of water per week. Too little water can result in small bulbs. Too much water can cause the bulbs to rot.
- Water early in the day, which helps ensure that the foliage is dry at night, reducing the chance of disease.
Fertilizing
- In early spring, apply 10-10-10 fertilizer, 1 pound per 100 square feet area or row, or use an organic option by following label directions.
Controlling Pests, Diseases and Other Problems
- Garlic typically is not plagued with pests. Onion maggot may bore into plant stems causing them to yellow and wilt. Onion thrips and some worms can be a problem. Garlic is susceptible to botrytis, fusarium basal rot and other types of rot.
- To lessen risk, plant good quality, healthy cloves. Keep weeds away from plants. Avoid injuring garlic bulbs. Do not plant garlic where onions were planted the previous three years.
Select the largest, best quality cloves for planting. Discard any that are soft or blemished.
Harvesting and Storing

Garlic is grown mostly for the bulbs. However, you can also harvest it in early spring as green garlic to use like green onions. The stems should be a bright, deep green and the bulbs will be small. The hardscape types will have a flower stalk that curls, which is called a scape. It can be harvested in early spring when tender. Dice and toss in salads or stir-fry dishes for a light garlic flavor.
Depending on your region, garlic bulbs are typically ready to harvest from late May to late July. A sign that it is ready will be the drying, browning, and bending of the foliage or leaf tops toward the ground. At this point, stop watering. When about half of the leaves have died back, it’s likely time to harvest. If you have grown several plants, test one plant by loosening the soil at its outer edges with a garden fork or spade, then lift the bulbs from the ground. If the cloves fill the skins, it’s time to harvest. If you plan to braid the tops, take care to carefully lift the bulbs and stem together to avoid damaging the stem. Braid the stalks when they are still pliable. Hang in a cool, dark space.
Shake off extra soil from the bulbs and lay the harvested bulbs and tops in the sun to dry or in a well-ventilated room. If left outside, you may want to fold the tops over the bulbs to protect the bulbs from direct sunlight. After a couple of days in the sun, move the bulbs to a cool, dry, well-ventilated area for further curing for four to six weeks. When the tops and bulbs are dry, cut the leaves or stems off about ½- to 1-inch above the bulb. Trim away any roots from the base of the bulb. Brush away any remaining soil. Do not wash the bulbs. Moisture can introduce mold and fungal diseases.
Store whole garlic bulbs and braids away from light, with adequate air circulation. When properly stored, garlic should last several months - softneck garlic up to 6-8 months and hardneck up to 3-4 months.
Expert Tips

- The better your soil preparation, the better your chances for fully developed, healthy bulbs.
- Garlic benefits from crop rotation. Garlic is susceptible to some of the same pests and diseases as onions, such as thrips, onion maggots, and various rots. If you have planted onions or garlic in your garden anytime the past three years, plant this year’s crop in a different place in the garden.
- During early spring, water during the day so that the foliage can dry before nighttime to reduce chances of disease.
Frequently asked questions
Can I plant garlic from the grocery store?
It’s best to order garlic “seed bulbs” from a garden catalog or purchase from a local nursery. Sometimes garlic in the grocery store has been treated so it won’t sprout.
Is elephant garlic a good option?
Elephant garlic is actually a type of leek and not a true garlic. While the plant has bulbs with cloves, they are milder than true garlic and can be bitter in cold climates.
What may be wrong if my garlic plants are pale green and thin and the tips of the leaves are yellow and the bulbs are very small?
You may have nitrogen deficiency in your soil. Have your soil tested. Garlic grows best in 6 to 7 pH. Improve the soil by adding well-rotted manure or compost. Follow soil test recommendations for amount of fertilizer needed.
Avoid planting grocery store garlic; it may have been treated to prevent sprouting. Instead, purchase garlic bulbs, sometimes called “seed bulbs,” from a garden catalog or your local garden center. They should be large, fresh, and free from disease.

