[Pet](https://www.tractorsupply.com/tsc/category/pet)[Lawn & Garden](https://www.tractorsupply.com/tsc/category/lawn-garden)[Truck & Automotive](https://www.tractorsupply.com/tsc/catalog/truck-automotive)[Clothing](https://www.tractorsupply.com/tsc/category/clothing)[Poultry](https://www.tractorsupply.com/tsc/category/poultry)[Heating & Cooling](https://www.tractorsupply.com/tsc/category/heating-cooling)[Horse](https://www.tractorsupply.com/tsc/category/horse)[Sporting Goods](https://www.tractorsupply.com/tsc/category/sporting-goods)[Outdoor Power Equipment](https://www.tractorsupply.com/tsc/category/outdoor-power-equipment)[Fencing & Gates](https://www.tractorsupply.com/tsc/category/fencing-gates)[Livestock](https://www.tractorsupply.com/tsc/catalog/livestock)[Outdoor Living](https://www.tractorsupply.com/tsc/category/outdoor-living)[Pet & Animal Pharmacy](https://www.tractorsupply.com/tsc/category/pet-animal-pharmacy)[Tools](https://www.tractorsupply.com/tsc/category/tools)[Home Improvement](https://www.tractorsupply.com/tsc/category/home-improvement)[Farm & Ranch](https://www.tractorsupply.com/tsc/category/farm-ranch)[Boots & Shoes](https://www.tractorsupply.com/tsc/category/boots-shoes)[Trailers & Towing](https://www.tractorsupply.com/tsc/category/trailers-towing)[Home Decor & Furniture](https://www.tractorsupply.com/tsc/category/home-decor-furniture)[Wild Birds & Wildlife](https://www.tractorsupply.com/tsc/category/wild-birds-wildlife)[Toys](https://www.tractorsupply.com/tsc/category/toys)[Gift Cards](https://www.tractorsupply.com/tsc/catalog/gift-cards-3074457345616710669-1)[Services](https://www.tractorsupply.com/tsc/services) [Propane Refill](https://www.tractorsupply.com/tsc/services/propane-refill-Franklin-TN-37069-2314)[Trailer Rental](https://www.tractorsupply.com/tsc/services/trailer-rental)[Garden Center](https://www.tractorsupply.com/tsc/services/garden-center-Franklin-TN-37069-2314)[Feed Center](https://www.tractorsupply.com/tsc/services/feed-center-Franklin-TN-37069-2314)[Same Day Delivery](https://www.tractorsupply.com/tsc/services/same-day-delivery)[PetVet Clinic](https://www.tractorsupply.com/tsc/services/petvet)[Pet Wash](https://www.tractorsupply.com/tsc/services/pet-wash)[Grooming at Petsense](https://www.tractorsupply.com/tsc/services/grooming-at-petsense)[Dog Training at Petsense](https://www.petsense.com/pages/training)[Tractor Supply Rx](https://www.tractorsupply.com/tsc/category/pet-animal-pharmacy)[Pet Insurance](https://quote.petted.com/quote/ref=tractor?cm_sp=Navi-_-Pet%20L1-_-Insurance)[Wag!](https://wagwalking.com/partners/tractor-supply?isIntSrch=written)
"Savings and Offers"
[Weekly Ad](https://www.tractorsupply.com/tsc/cms/digital-flyer)[Sale](https://www.tractorsupply.com/tsc/sale)[Clearance](https://www.tractorsupply.com/tsc/clearance)
"More Options"
[Weekly Ad](https://www.tractorsupply.com/tsc/cms/digital-flyer)[What's New](https://www.tractorsupply.com/tsc/whatsnew)[Tractor Supply App](https://www.tractorsupply.com/tsc/cms/app)[Earn Rewards with Neighbor's Club](https://www.tractorsupply.com/tsc/cms/neighbors-club)[Hometown Heroes](https://www.tractorsupply.com/tsc/myaccount/herobenefits)[Life Out Here Blog](https://www.tractorsupply.com/tsc/cms/life-out-here)[TSC Exclusive Brands](https://www.tractorsupply.com/tsc/cms/exclusive-brands)[Top Brands](https://www.tractorsupply.com/tsc/brands)[Clearance Items](https://www.tractorsupply.com/tsc/clearance)[Battery Finder](https://tractorsupply.interstatebatteries.com/?cm_sp=Header-_-Shop-_-Battery_Finder)[Outdoor Power Equipment Parts Finder](http://www.ordertree.com/tsc/?cm_sp=Header-_-Shop-_-Parts_Finder)[Hitch Finder](https://www.reesetowpower.com/tractor-supply/?cm_sp=Header-_-Shop-_-Hitch_Finder)
Spend $49.99 to unlock Free Delivery on most orders
|
[Learn More](https://www.tractorsupply.com)
[Order status](https://www.tractorsupply.com/OrderLookUpView)[TSC Credit Cards](https://www.tractorsupply.com/tsc/cms/credit)[What’s new](https://www.tractorsupply.com/tsc/whatsnew)[Petsense](https://www.petsense.com/)[Weekly Ad](https://www.tractorsupply.com/tsc/cms/digital-flyer)
[](https://www.tractorsupply.com)
[](https://www.tractorsupply.com/)
Grassland (Franklin) TN
GRASSLAND (FRANKLIN) TN #2314
[2176 Hillsboro RD STE 122
Franklin, TN 37069](https://www.google.com/maps/search/?api=1&query=Tractor%20Supply%20Co.%201650%20Denmark%20RD%2CUnion%2CMO%2063084)
Open at 8:00 am
615-595-5700
Store Hours:
[Details](https://www.tractorsupply.com/tsc/store_Franklin-TN-37069_2314)
Grassland (Franklin) TN
Open till 9 pm
Deliver to
37027
Sign In / Enroll
Get Rewarded!
Sign In / Enroll
Get rewarded!
[](https://www.tractorsupply.com/tsc/cart)
Pet
Lawn & Garden
Truck & Automotive
Clothing
Poultry
Heating & Cooling
Horse
Sporting Goods
Outdoor Power Equipment
Fencing & Gates
Livestock
Outdoor Living
Pet & Animal Pharmacy
Tools
Home Improvement
Farm & Ranch
* * *
[Menu](https://www.tractorsupply.com)
Search
[Home](https://www.tractorsupply.com/)
Sign In
[Cart](https://www.tractorsupply.com/tsc/cart)
* * *
CATEGORIES
Pets
- [Dogs](https://www.tractorsupply.com/tsc/cms/life-out-here/pet/dogs)
- [Cats](https://www.tractorsupply.com/tsc/cms/life-out-here/pet/cats)
- [All](https://www.tractorsupply.com/tsc/cms/life-out-here/pet)
The Barn
- [Horse](https://www.tractorsupply.com/tsc/cms/life-out-here/the-barn/horse)
- [Livestock](https://www.tractorsupply.com/tsc/cms/life-out-here/the-barn/livestock)
- [Goats & Sheep](https://www.tractorsupply.com/tsc/cms/life-out-here/the-barn/goats-and-sheep)
- [Pigs](https://www.tractorsupply.com/tsc/cms/life-out-here/the-barn/pigs)
- [All](https://www.tractorsupply.com/tsc/cms/life-out-here/the-barn)
The Coop
- [Start Your Flock](https://www.tractorsupply.com/tsc/cms/life-out-here/the-coop/start-your-flock)
- [Poultry Breeds](https://www.tractorsupply.com/tsc/cms/life-out-here/the-coop/poultry-breeds)
- [Coop Tips](https://www.tractorsupply.com/tsc/cms/life-out-here/the-coop/coop-tips)
- [Chick Care](https://www.tractorsupply.com/tsc/cms/life-out-here/the-coop/chick-care)
- [All](https://www.tractorsupply.com/tsc/cms/life-out-here/the-coop)
Garden
- [Gardening Tips](https://www.tractorsupply.com/tsc/cms/life-out-here/garden/gardening-tips)
- [Growing Guides](https://www.tractorsupply.com/tsc/cms/life-out-here/garden/growing-guides)
Home & Land
- [Fresh Recipes](https://www.tractorsupply.com/tsc/cms/life-out-here/garden-home-land/fresh-recipes)
- [Heating & Cooling](https://www.tractorsupply.com/tsc/cms/life-out-here/garden-home-land/heating-and-cooling)
- [Bees](https://www.tractorsupply.com/tsc/cms/life-out-here/garden-home-land/bees)
- [Lawn](https://www.tractorsupply.com/tsc/cms/life-out-here/garden-home-land/lawn)
- [Fencing](https://www.tractorsupply.com/tsc/cms/life-out-here/garden-home-land/fencing)
- [All](https://www.tractorsupply.com/tsc/cms/life-out-here/garden-home-land)
Tool Shop
- [The Garage](https://www.tractorsupply.com/tsc/cms/life-out-here/tool-shop/the-garage)
- [Tool Tips](https://www.tractorsupply.com/tsc/cms/life-out-here/tool-shop/tool-tips)
- [Stock Your Shop](https://www.tractorsupply.com/tsc/cms/life-out-here/tool-shop/stock-your-shop)
- [All](https://www.tractorsupply.com/tsc/cms/life-out-here/tool-shop)
Outdoor Life
- [Birding](https://www.tractorsupply.com/tsc/cms/life-out-here/outdoor-life/birding)
- [Recreation](https://www.tractorsupply.com/tsc/cms/life-out-here/outdoor-life/recreation)
- [Hunting](https://www.tractorsupply.com/tsc/cms/life-out-here/outdoor-life/hunting)
- [All](https://www.tractorsupply.com/tsc/cms/life-out-here/outdoor-life)
1. [Home](https://www.tractorsupply.com/tsc/cms/life-out-here)
2. [Garden](https://www.tractorsupply.com/tsc/cms/life-out-here/garden)
3. [Growing Guides](https://www.tractorsupply.com/tsc/cms/life-out-here/garden/growing-guides)
4. [Fruits](https://www.tractorsupply.com/tsc/cms/life-out-here/garden/growing-guides/fruits)
5. How to Grow Bell Peppers
* * *
# How to Grow Bell Peppers
Authored by [Leah Chester-Davis](https://www.tractorsupply.com/tsc/cms/life-out-here/authors/leah-chester-davis-master-gardener-author "Links to Leah Chester-Davis author page.")
Raw or cooked, peppers are versatile. Add them to salads, soups, stews, stir-fries, pizzas, relishes, or egg dishes. Sauté a medley as a side dish to complement any meat. Stuff them with rice, cheese, or meat and bake. Roast them for delicious depth of flavor. Enjoy them raw as snacks.
* * *
Bell peppers, often called sweet peppers, lend both color and flavor to meals. There was a time when the only choice in the grocery store was green bells. For the home gardener, getting a red pepper meant leaving the green peppers on the plant long enough to ripen to red. Now, thanks to plant breeding, there are many options for home gardeners that represent nearly every color of the rainbow: yellow, orange, red, purple, and green, depending on the variety. Most varieties are green during the unripe stage – a few are lime green, lavender, purple, or ivory – but allow them to ripen to their mature color and you are rewarded with not only a longer harvest window but some delicious eating.
Peppers deliver lots of healthful benefits such as vitamins A, B6, E, C, folate, potassium, and fiber. Red peppers amp up those benefits with the highest amounts of beta carotene and quercetin. The nutritional components of peppers can help protect against cancer and heart disease, keep blood sugar levels even, and contribute to overall health.
### About bell peppers
| | |
|----------------------|---------------------------------------------------------------------------------------------------------------|
| Botanical name: | *Capsicum annuum* |
| Common name: | Bell pepper |
| Plant type: | Herbaceous perennial grown as annual |
| Size: | Plants 3 to 4 feet tall; peppers roughly 3 x 3 inches |
| Sun exposure: | Full sun, at least 6 hours daily |
| Soil type: | Well-drained, loamy |
| Soil pH: | 6.0 to 6.8 |
| Hardiness zones: | Grown as an annual in 3 to 11 |
| Average first frost: | [Varies by region](https://www.almanac.com/gardening/frostdates "Varies by region opens Almanac region map.") |
| Average last frost: | [Varies by region](https://www.almanac.com/gardening/frostdates "Varies by region opens almanac region map.") |
| Container friendly: | Yes |
| Beginner friendly: | Yes |
[Growing](https://www.tractorsupply.com#growing)
[Planting](https://www.tractorsupply.com#planting)
[Harvesting](https://www.tractorsupply.com#harvesting)
[Expert Tips](https://www.tractorsupply.com#experttips)
[FAQ](https://www.tractorsupply.com#faq)
## Growing

Peppers are a warm-season plant so plant in the garden after danger of frost has passed, when the soil has warmed to about 70 degrees F, and when overnight temperatures do not dip below 50 degrees F. The best way to check the soil temperature is with a [soil thermometer](https://www.tractorsupply.com/tsc/catalog/soil-monitoring "Links to all soil monitoring catalog.") at your local garden center. For those who want to go to a little extra trouble and get a jumpstart, or if temperatures are on the chilly side, use black plastic mulch to warm the soil and floating row covers.
Peppers grow in many soil types if it is well-drained, with a pH of 6.0 to 6.8, and in a spot with at least 6, preferably 8 to 10 hours of sun each day. A few weeks before planting, prepare your soil by adding plenty of organic compost and working into the soil to a depth of 6 to 8 inches. To determine your soil pH and whether it needs other amendments, a soil test is recommended. Soil test kits are available from your county Extension office for free or a nominal fee. It can be helpful to have your soil tested every three to five years. In the absence of a soil test, see “Fertilizing” below for recommendations.
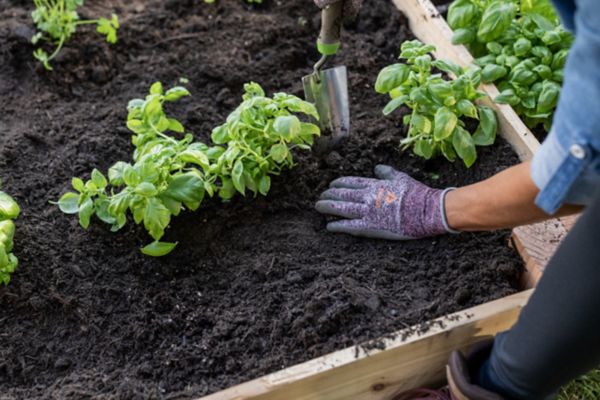
If starting pepper plants from seeds, start them about six to eight weeks before the time to transplant them to the garden, or buy healthy, sturdy transplants, up to a foot tall, at [your local garden center](https://www.tractorsupply.com/tsc/store-locator? "Links to TSC store locator."). Check them to make sure there are no insects or yellow or brown spots on leaves or stems.
Plant three to four plants per person for fresh use, and more for preserving.
* * *
Avoid planting where tomatoes, eggplants or potatoes were planted the previous three years.
* * *
## Planting

After you have your soil worked, water transplants well before transplanting. In the garden, space transplants 12 to 24 inches apart in a row. Rows should be about 30 to 36 inches apart. Dig a hole that is large enough for the root ball or peat pot, typically 3 to 4 inches deep. Before setting the plant into the hole, fill the hole with water and let it soak in. Set the seedlings even with the soil line as they were in the container before transplanting. If transplanting in a peat pot, completely bury the top edge of the peat to avoid it wicking away moisture from the roots. Lightly tamp down and firm the soil. Water thoroughly.
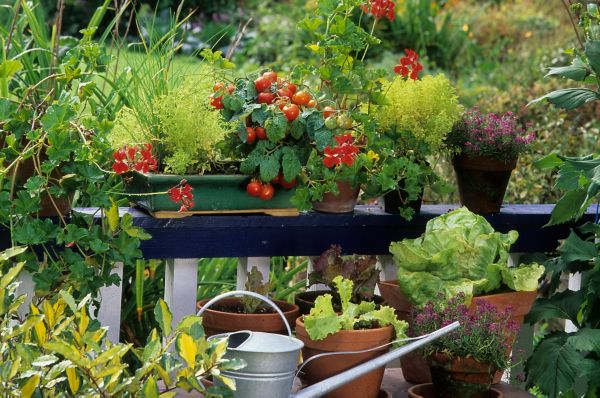
When [planting in a container](https://www.tractorsupply.com/tsc/catalog/pots-planters "Links to all pots and planters catalog."), use a quality potting mix for vegetables. Make sure the container has drainage holes and is large enough to give your plant room to grow, at least 14 to 18 inches in diameter and 12 to 18 inches deep. Plants in containers may need more frequent watering than those in a garden bed. They likely will need water every day and maybe even twice a day depending on the container, the site, and the summer temperatures.
Peppers need consistent water levels to produce quality fruit, an inch of water per week. Avoid overhead watering to reduce chances of foliar diseases. Rather than light watering, which can result in shallow roots, water thoroughly once per week. Drip irrigation or soaker hoses are best.
After temperatures have warmed, apply a 3- to 4-inch layer of straw or other organic mulch to suppress weed growth and to keep soil moisture levels even. Do not pile the mulch against the base of the plant.
Plants can grow quite tall and fruit loads can be heavy, particularly since peppers have a shallow root system. [Staking](https://www.tractorsupply.com/tsc/catalog/plant-stakes "Links to all plant stake catalog.") the peppers can provide helpful support to help keep the plant from splitting.
* * *
### Fertilizing
- Soil that is enriched with plenty of organic matter typically requires less fertilizer.
- If you have had your soil tested, follow recommendations. In the absence of a soil test, for a single plant, Texas A&M Extension recommends placing 2 level tablespoons of a complete fertilizer such as 10-10-10. Mix it well with the soil around the plant. For a larger area, Georgia Extension recommends a complete fertilizer such as 10-10-10 at the rate of 2 pounds per 100 square feet of garden. Or use an organic fertilizer for vegetables. Follow label directions. Ideally, adding fertilizer to your planting area should be done two to three months before planting. Otherwise, apply at the time of planting. Another application when the first fruits appear can be beneficial. Sidedress each plant with about 2 tablespoons of a complete fertilizer. Sidedress means to apply to the side or around the plant, keeping the fertilizer about 6 inches away from the stem of the plant. Lightly work it into the soil. Water after applying fertilizer.
- Do not use any weed and feed fertilizers on vegetable plants.
- If growing in a container, a regular application of soluble fertilizer may be helpful. Follow label directions.
### Controlling Pests, Diseases, and Other Problems
- Various wilts, bacterial leaf spot, and viruses can be a problem though many varieties now have resistance to these diseases. Good cultural practices such as crop rotation, removing any diseased plant from the garden, and starting with healthy soil and plants can all help reduce disease problems. For problems with leaf spots, neem oil, sulfur, or other fungicides can be used. Follow label directions.
- Peppers sometimes suffer from blossom-end rot. Make sure the plants have consistent soil moisture levels. A short-term solution may be to apply a product with calcium chloride, according to Georgia Extension. A long-term solution is to have your soil tested and amend, following recommendations.
- Aphids can leave a sticky residue on the lower leaves and fruit. If infestation is heavy, consider insecticidal soap or neem oil. Flea beetles and leaf miners are other pests. Organic treatments include sulfur and Bt-based insecticides. Follow label directions.
- Cutworms sometimes chew stems at the soil line. Placing a cardboard collar around new transplants can help protect them.
* * *
## Harvesting and Storing

Peppers typically mature 70 to 85 days (about 3 months) after transplanting. If starting from seed, it likely will take 100 to 120 days (about 4 months) to maturity. When they are full-sized with firm fruit walls, they can be harvested. Harvest them green or, if you are growing a yellow, red, or purple variety, simply leave it on the plant longer to allow time for the fruit to change colors. Even the traditional green varieties will change to a red when left on the plant.
To harvest, cut the stem of the fruit from the plant to avoid breaking the branches. Harvest as soon as the plant is desired size and color.
### Storing
Store peppers in the refrigerator. They will last two to three weeks.
They can be marinated, pickled, [canned](https://www.tractorsupply.com/tsc/cms/life-out-here/garden-home-land/fresh-recipes/how-to-can-food-guide "Links to basic canning 101 guide."), or frozen. An easy freezing method is to wash and then allow to drain to dry thoroughly. Cut the peppers and remove the core, then slice into strips. Spread them out in a single layer onto a tray, and then freeze. After they are frozen, place in a freezer bag and return to the freezer. This method makes it easy to pull out the amount needed for stir-fry dishes, soups, stews, or casseroles.
* * *
Store peppers in the refrigerator. They will last two to three weeks.
* * *
## Expert Tips

- Well-drained soil is important for peppers. They do not handle soggy soils well; it can lead to root rot. An even soil moisture level is important to help avoid problems with blossom-end rot.
- Avoid letting the peppers wilt; this reduces both yield and quality of the fruit.
* * *
* * *
## Frequently asked questions
* * *
__Why do my peppers have black areas near the ends of the fruit?__
This sounds like blossom-end root, which can be a problem for both peppers and tomatoes when moisture levels in the soil are uneven and the plant is unable to take up calcium from the soil. The best way to manage this is to keep soil evenly moist. If possible, use drip irrigation or soaker hoses. Mulch can also help keep the soil from drying out. Before next season, have your soil tested to determine if the pH levels need to be adjusted.
* * *
__Why isn’t there any fruit on my large, beautiful, healthy-looking pepper plants?__
It could be any number of reasons. Luxuriant, beautiful foliage and no fruit may be due to overfertilization. Other reasons could be weather conditions. If the weather was unseasonably cold at the beginning of the season it may have affected fruit set. Extreme heat also can prevent fruit set.
* * *
* * *
* * *
### More guides to growing
- [
\
__Growing Guide: Make Your Non-Edible Plants and Flowers Thrive__
We get it – growing edible plants, such as fruits, vegetables and herbs, isn’t for everyone. But before you just buy any flowers and plants, you’ll need to be prepared with the know-how and gardening supplies to help them thrive. Read More](https://www.tractorsupply.com/tsc/cms/life-out-here/garden/growing-guides/flowers/growing-guide--make-your-non-edible-plants-and-flowers-thrive)
- [
\
__How to care for Norfolk pines__
These holiday favorite trees may have pine in the name, but are really tropical evergreens. Learn more about caring for Norfolk pines. Read More](https://www.tractorsupply.com/tsc/cms/life-out-here/garden/growing-guides/indoor-plants/how-to-grow-norfolk-pine)
- [
\
__How to Grow Parsley__
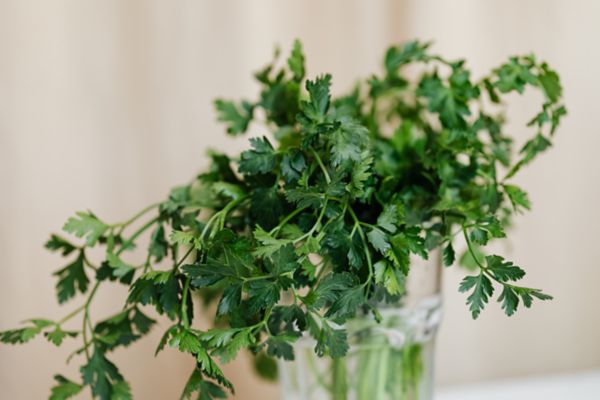
Parsley is most often found as a garnish, but it has so many other benefits - including a host plant for pollinators. Learn how to grow this herb. Read More](https://www.tractorsupply.com/tsc/cms/life-out-here/garden/growing-guides/herbs/how-to-grow-parsley)
## Learn more about gardening
- [
\
__Best Soil for Planting: Garden Soil Basics__
Find out which soil is best for what project and how to keep your garden bed dirt at its peak. Read More](https://www.tractorsupply.com/tsc/cms/life-out-here/garden-home-land/gardening/best-soil-for-garden)
- [
\
__Garden Tools: Your Guide to Essential Gardening Tools__
Get the basics on your basic gardening tools. Find out which tools are a must-have for easy gardening. Read More](https://www.tractorsupply.com/tsc/cms/life-out-here/garden-home-land/gardening/garden-tools-guide)
- [
\
__How to Grow Plants & Start a Garden__
Learn how to grow a plant with this comprehensive guide. From indoor vs. outdoor to the best season for growing, even novice planters can develop a green thumb. Read More](https://www.tractorsupply.com/tsc/cms/life-out-here/garden-home-land/gardening/how-to-grow-plants-the-ultimate-guide-to-growing)
Get the top deals, latest trends and more
Sign up for emails from Tractor Supply today.
First Name*
First Name*
Last Name*
Last Name*
Email*
Email*
Sign Up
### Customer Support
- [Order Status](https://www.tractorsupply.com/OrderLookUpView)
- [Return Policy](https://www.tractorsupply.com/tsc/customer-solutions#ProductReturns)
- [Delivery Options](https://www.tractorsupply.com/tsc/customer-solutions#DeliveryOptions)
- [Tax Exemptions](https://www.tractorsupply.com/tsc/cms/policies-information/customer-solutions/tax-exemption)
- [Frequently Asked Questions](https://www.tractorsupply.com/tsc/customer-solutions#CustomerFAQ)
- [Contact Us](https://www.tractorsupply.com/tsc/customer-solutions#contact)
- [Recall Notices](https://www.tractorsupply.com/tsc/cms/policies-information/customer-solutions/recall-notices.html)
- Call:
(877) 718-6750
- [](https://www.tractorsupply.com)
Mon - Sat: 7am - 9pm CT
- [](https://www.tractorsupply.com)
Sun: 8am - 7pm CT
- [](https://www.tractorsupply.com)
Closed Christmas Day
### About Us
- [Who We Are](https://corporate.tractorsupply.com/company-overview/company-profile/default.aspx)
- [Investor Relations](https://ir.tractorsupply.com/CorporateProfile)
- [Stewardship](https://corporate.tractorsupply.com/stewardship/overview/default.aspx)
- [Community](https://ir.tractorsupply.com/Peer)
- [Military Support](https://www.tractorsupply.com/tsc/cms/military)
- [Product Catalog](https://www.tractorsupply.com/a/pt/index)
- [Tractor Supply Stores](https://www.tractorsupply.com/tsc/store-locator)
- [.Pharmacy Verified Website](https://tractorsupply.com/tsc/cms/accreditation)
### Work With Us
- [Careers](https://www.tractorsupply.careers/?utm_source=corpsite&utm_campaign=TSC_Shop&cm_sp=footer-_-tsc%20careers)
- [Sponsorship](https://www.tractorsupply.com/tsc/cms/policies-information/about-tsc/sponsorships)
- [Affiliate Program](https://www.tractorsupply.com/tsc/cms/policies-information/affiliate-program)
- [Potential Vendor Partners](https://www.tractorsupply.com/tsc/cms/policies-information/vendor-information/potential-vendor-partners)
- [Vendor Information](https://www.tractorsupply.com/tsc/cms/policies-information/vendor-information/vendor-center)
- [Tractor Supply Media Network](https://www.tractorsupplymedianetwork.com/)
### Neighbor's Club
- [About](https://www.tractorsupply.com/tsc/cms/neighbors-club)
- [Rewards](https://www.tractorsupply.com/AccountDashboardView?catalogId=10051&langId=&storeId=10151&topNav=nCOfferReward%3Fcm_sp%3Dfooter-_-navigation-_-Neighbors%20Club%20Member)
- [Hometown Heroes](https://www.tractorsupply.com/tsc/myaccount/herobenefits)
- [Frequently Asked Questions](https://www.tractorsupply.com/tsc/cms/neighbors-club-faq)
- [Terms & Conditions](https://www.tractorsupply.com/tsc/cms/neighbors-club-terms-and-conditions)
### Credit Center
- [TSC Credit Card](https://www.tractorsupply.com/tsc/cms/credit)
- [Klarna](https://www.tractorsupply.com/tsc/cms/klarna)
### Stay Connected
Connect & Share with the Tractor Supply Community.
- [](https://www.facebook.com/TractorSupplyCo?cm_sp=footer-_-social%20icons-_-facebook)
- [](https://www.pinterest.com/tractorsupplyco?cm_sp=footer-_-social%20icons-_-pinterest)
- [](https://instagram.com/tractorsupply?cm_sp=footer-_-social%20icons-_-instagram)
- [](https://www.youtube.com/user/TSCTractorSupply?cm_sp=footer-_-social%20icons-_-youtube)
- [](https://www.tiktok.com/@tractorsupply?cm_sp=footer-_-social%20icons-_-tiktok)
### Tractor Supply App
Shop on the go with the Tractor Supply App
[Learn More](https://www.tractorsupply.com/tsc/cms/app.html)
[](https://apps.apple.com/us/app/id1502197298)
[](https://play.google.com/store/apps/details?id=com.consumerapp_v1)
### Customer Support
- [Order Status](https://www.tractorsupply.com/OrderLookUpView)
- [Return Policy](https://www.tractorsupply.com/tsc/customer-solutions#ProductReturns)
- [Delivery Options](https://www.tractorsupply.com/tsc/customer-solutions#DeliveryOptions)
- [Tax Exemptions](https://www.tractorsupply.com/tsc/cms/policies-information/customer-solutions/tax-exemption)
- [Frequently Asked Questions](https://www.tractorsupply.com/tsc/customer-solutions#CustomerFAQ)
- [Contact Us](https://www.tractorsupply.com/tsc/customer-solutions#contact)
- [Recall Notices](https://www.tractorsupply.com/tsc/cms/policies-information/customer-solutions/recall-notices.html)
- [Call:](https://www.tractorsupply.com) [(877) 718-6750](tel:%28877%29%20718-6750)
- [](https://www.tractorsupply.com)
Mon - Sat: 7am - 9pm CT
- [](https://www.tractorsupply.com)
Sun: 8am - 7pm CT
- [](https://www.tractorsupply.com)
Closed Christmas Day
### About Us
- [Who We Are](https://corporate.tractorsupply.com/company-overview/company-profile/default.aspx)
- [Investor Relations](https://ir.tractorsupply.com/CorporateProfile)
- [Stewardship](https://corporate.tractorsupply.com/stewardship/overview/default.aspx)
- [Community](https://ir.tractorsupply.com/Peer)
- [Military Support](https://www.tractorsupply.com/tsc/cms/military)
- [Product Catalog](https://www.tractorsupply.com/a/pt/index)
- [Tractor Supply Stores](https://www.tractorsupply.com/tsc/store-locator)
- [.Pharmacy Verified Website](https://tractorsupply.com/tsc/cms/accreditation)
### Work With Us
- [Careers](https://www.tractorsupply.careers/?utm_source=corpsite&utm_campaign=TSC_Shop&cm_sp=footer-_-tsc%20careers)
- [Sponsorship](https://www.tractorsupply.com/tsc/cms/policies-information/about-tsc/sponsorships)
- [Affiliate Program](https://www.tractorsupply.com/tsc/cms/policies-information/affiliate-program)
- [Potential Vendor Partners](https://www.tractorsupply.com/tsc/cms/policies-information/vendor-information/potential-vendor-partners)
- [Vendor Information](https://www.tractorsupply.com/tsc/cms/policies-information/vendor-information/vendor-center)
- [Tractor Supply Media Network](https://www.tractorsupplymedianetwork.com/)
### Neighbor's Club
- [About](https://www.tractorsupply.com/tsc/cms/neighbors-club)
- [Rewards](https://www.tractorsupply.com/AccountDashboardView?catalogId=10051&langId=&storeId=10151&topNav=nCOfferReward%3Fcm_sp%3Dfooter-_-navigation-_-Neighbors%20Club%20Member)
- [Hometown Heroes](https://www.tractorsupply.com/tsc/myaccount/herobenefits)
- [Frequently Asked Questions](https://www.tractorsupply.com/tsc/cms/neighbors-club-faq)
- [Terms & Conditions](https://www.tractorsupply.com/tsc/cms/neighbors-club-terms-and-conditions)
### Credit Center
- [TSC Credit Card](https://www.tractorsupply.com/tsc/cms/credit)
- [Klarna](https://www.tractorsupply.com/tsc/cms/klarna)
### Stay Connected
Connect & Share with the Tractor Supply Community.
- [](https://www.facebook.com/TractorSupplyCo?cm_sp=footer-_-social%20icons-_-facebook)
- [](https://www.pinterest.com/tractorsupplyco?cm_sp=footer-_-social%20icons-_-pinterest)
- [](https://instagram.com/tractorsupply?cm_sp=footer-_-social%20icons-_-instagram)
- [](https://www.youtube.com/user/TSCTractorSupply?cm_sp=footer-_-social%20icons-_-youtube)
- [](https://www.tiktok.com/@tractorsupply?cm_sp=footer-_-social%20icons-_-tiktok)
### Tractor Supply App
Shop on the go with the Tractor Supply App
[Learn More](https://www.tractorsupply.com/tsc/cms/app.html)
- [](https://apps.apple.com/us/app/id1502197298)
- [](https://play.google.com/store/apps/details?id=com.consumerapp_v1)
- [Privacy policy](https://www.tractorsupply.com/tsc/cms/policies-information/customer-solutions/privacy-policy.html)
- [Your Privacy Choices](#)
- [Terms and Conditions](https://www.tractorsupply.com/tsc/cms/policies-information/customer-solutions/terms-and-conditions-of-use.html)
- [California Transparency Act](https://www.tractorsupply.com/tsc/cms/policies-information/about-tsc/california-transparency-act-of-2010.html)
- [Legal Notices](https://www.tractorsupply.com/tsc/cms/policies-information/customer-solutions/legal-notices.html)
- [Accessibility](https://www.tractorsupply.com/tsc/cms/accessibility.html)
- [Responsible Disclosure Statement](https://www.tractorsupply.com/tsc/cms/policies-information/customer-solutions/responsible-disclosure-statement.html)
- [Surprise (Balance) Medical Billing Disclosure](https://www.tractorsupply.com/tsc/cms/surprise-billing)
- [Transparency in Coverage](https://transparency-in-coverage.uhc.com/?cm_sp=footer-_-navigation-_-transparency%20coverage)
- [Human Rights Policy](https://www.tractorsupply.com/tsc/cms/human-rights-policy)
- [Vendor Code of Conduct](https://www.tractorsupply.com/tsc/cms/vendor-code-of-conduct)
- [California Notice of Collection](https://www.tractorsupply.com/tsc/cms/policies-information/customer-solutions/privacy-policy#_Toc189006423)
- [Privacy Requests](https://privacyportal.tractorsupply.com/)
© 2026, Tractor Supply Co. All Rights Reserved.