Sheet Mulching How-To
Authored by Leah Chester-Davis
You will be taken automatically to your search results.
Please enable your microphone
Your speech was not recognized
Click the microphone in the search bar to try again, or start typing your search term.
Authored by Leah Chester-Davis

Sheet mulching is a technique to turn grassy areas into planting beds without breaking your back digging up and removing turf or by using unwanted chemicals to remove grass and weeds. Sometimes called sheet composting or lasagna gardening, it is easy and efficient and worth using in your garden. It is also a method that is often used in permaculture.
The typical materials needed are either cardboard or layers of newspaper and organic material such as grass clippings, manure, straw and wood chips.
This composting method has many benefits. In addition to being a natural way to kill weeds rather than using herbicides, it also cuts the need to till the soil, which can disrupt the soil ecology. Instead, it is a great way to build the soil. It can be used in either small or large spaces.
When planning to use this method, start months before you want to plant. Fall is a great time to implement sheet mulching to give materials time to decompose over the fall and winter months. It typically takes four to six months for the materials to break down. By spring you should have a head start on a desirable planting bed for whatever you wish to plant, from ornamental plants to garden vegetables.
1: Decide the site size
If you are transforming a turf area or renovating an existing bed, figure out the size and shape of the finished bed. This will help you determine the amount of material you will need.
2: Gather your materials
What to use for successful sheet mulching:
3: Lay out garden bed and mow
Whether you plan on mulching a straight-edged, rectangular shape or are creating a curved bed to fit your landscape, it may be helpful to mark off the area with stakes or strings. Mow the area closely, leaving grass clippings and weeds to decompose.
While not having to dig is attractive to many and one of the bonuses of this method, some people dig a small edging border around the area to define it, but it is not necessary. If you choose to dig an edge, simply throw the dug-up soil into the bed area.
4: Add amendments
If you have had a soil test, this is the time to add amendments based on the recommendations. Simply sprinkle amendments over the surface area of the ground before adding the layers. In the absence of a soil test, proceed to the next step.
5: Soak the soil
The day before you start your layers, soak the area with water. If the soil is compacted, loosen it by pushing a spading fork or spading shovel into the ground and moving it back and forth a little to loosen the soil. Repeat sporadically across the site without digging up the soil.
6: Add the cardboard layers
Begin laying large pieces of cardboard or layers of newspaper, whichever you are using, down onto the ground, following the bed outline you have laid out. One layer is all you need. Overlap layers 6 to 8 inches so that are no gaps or holes that might allow any grass or weed growth. The goal is to smother out any vegetation beneath the cardboard. After the cardboard is down, wet it thoroughly. Avoid walking on the cardboard or paper layer.
7: Add the organic layer
After you have the cardboard layer down and dampened, add a thick layer, 12 to 18 inches, of organic material. This can be a layer of nitrogen sources such as grass clippings, other yard waste, and aged manure. Top that with a layer of carbon sources such as chopped leaves, straw, pine needles, or finely ground wood chips. Continue to alternate layers until you have 12 to 18 inches of organic material. Avoid adding any garden debris that contains diseased plants, weed seeds, herbicides, or pesticides.
Dampen the organic material with water.
If you wish to have the sheet-mulched area to have a tidier look as it decomposes, add a two-inch layer of straw, pine bark, or compost to the top.
8: Allow materials to decompose
For best results, it is best to allow your sheet-mulched area plenty of time to decompose. By preparing it in the fall, the area will have about six months to decompose before spring planting. Though fall is an optimal time to employ this great technique because the decomposition activity can occur over the late fall, winter, and early spring, it can be used any time.
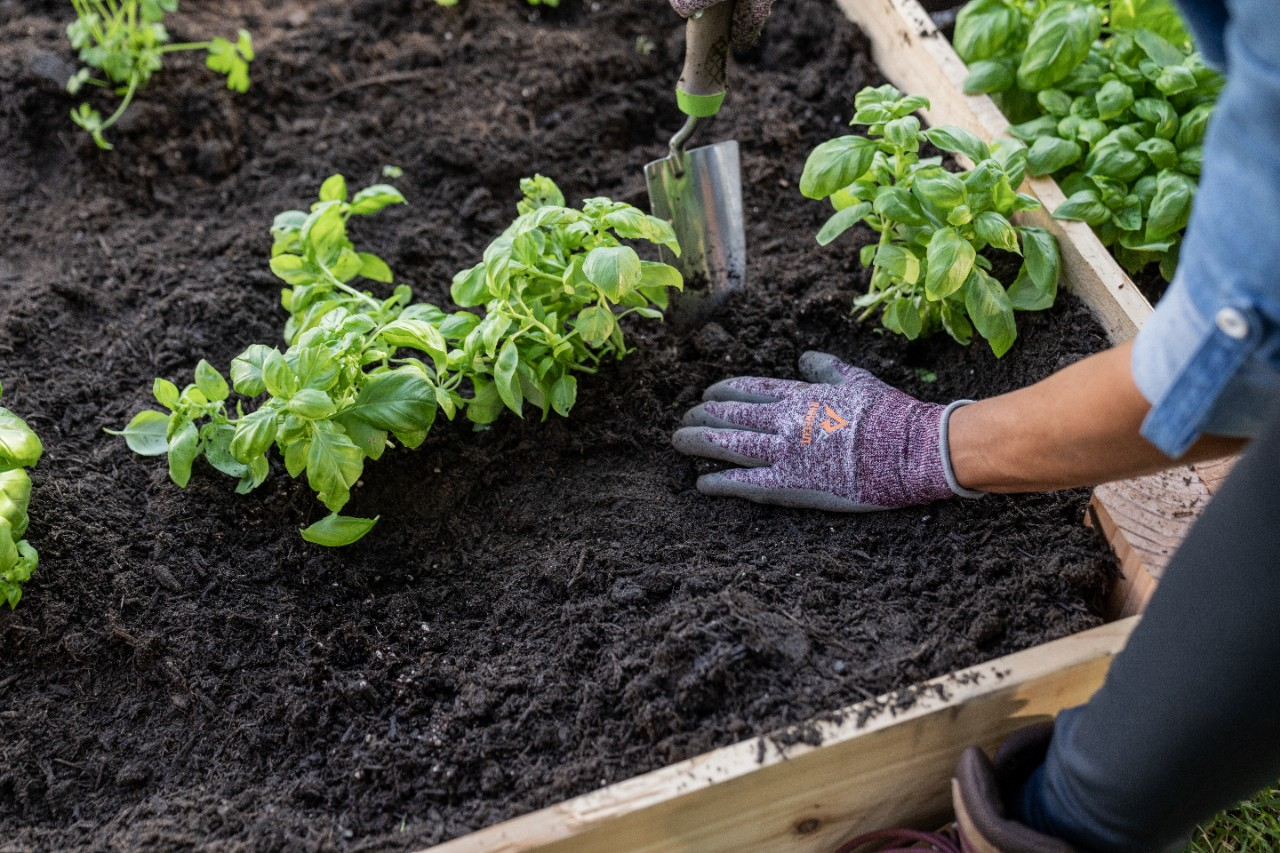
When spring rolls around and the materials have decomposed, you will have a new garden bed ready for planting. What could make a gardener happier? Use a trowel, garden knife, or spade to scoop the mulch away where you want to plant. Place plant roots directly into the soil.