

Composting at Home
Authored by Carol J. Alexander
You will be taken automatically to your search results.
Please enable your microphone
Your speech was not recognized
Click the microphone in the search bar to try again, or start typing your search term.
Authored by Carol J. Alexander
Nearly 30% of the average American household’s garbage is made up of food scraps and yard waste, according to the Environmental Protection Agency. That means it’s possible nearly 30% of everything you throw away is compostable.
Why is that important? Well, organic material that’s thrown in the trash takes up space in landfills and releases methane gas. To curb the negative impact this waste can have on the environment, some cities require that it be disposed of through composting. In 2009, San Francisco passed the nation’s first ordinance requiring both businesses and residents to separate their food waste into compost bins. In 2015, Seattle followed suit, forbidding residents from throwing food scraps away.
Greater awareness of what we throw away, the environmental consequences, and resulting legislation can overwhelm someone willing to make a difference but unsure where to begin. The simplest place to start is composting. Along with helping to reduce the amount of waste your household creates, composting also has some major benefits for your garden and land.
The benefits of composting at home
According to Greg Evanylo, professor and extension specialist, school of plant and environmental sciences, at Virginia Tech, the benefits of properly composted kitchen and yard waste include:
How to compost at home
Getting started is fairly simple, as long as you have a plan and enough space.
Ingredients for composting at home
Composting includes three ingredients:
“Carbon is largely the energy source,” Greg says. “And nitrogen supplies the amino acids and proteins that build new cells.” Mixing these ingredients together and allowing them to “cook” provides microbes the perfect environment to decompose the materials.
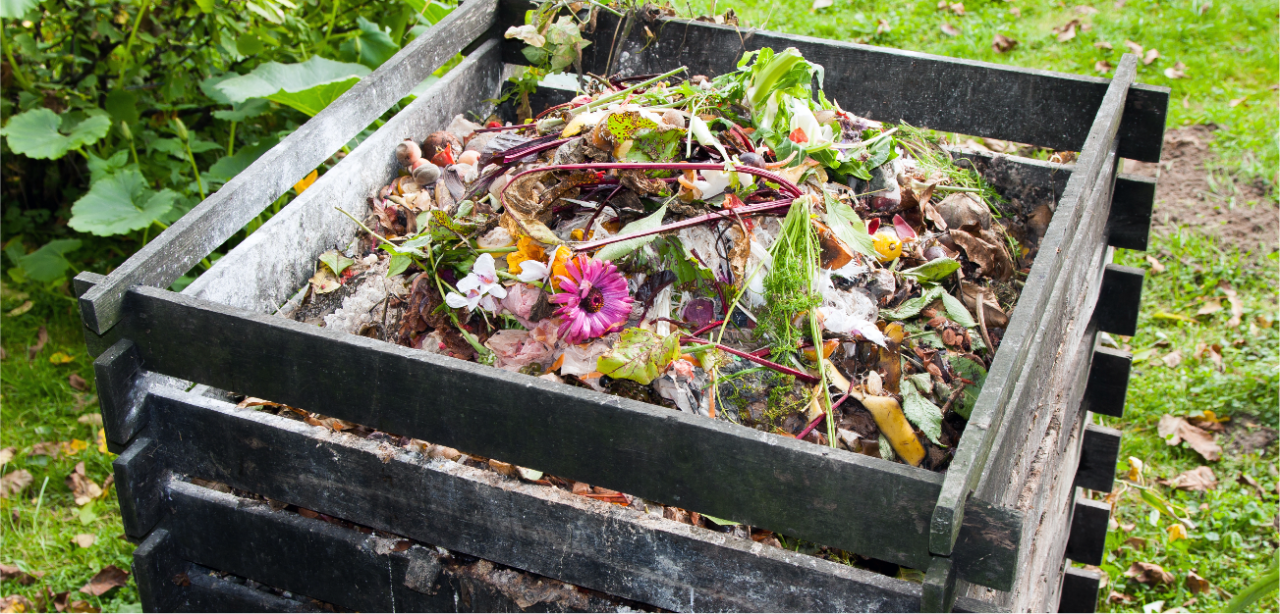
What’s compostable?
Brown, carbon-containing matter:
While the following are technically compostable, they can cause odor problems. So it’s best to leave them out.
Never compost the following, even if you’re a pro:
Charcoal and chemically treated wood contain toxic chemicals you don’t want in your food supply. Black walnut produce the substance juglone, which stunts the growth of and even causes the death of some plants.
Choose Your composting location
Choose a spacious spot on your land to collect these ingredients. Beginner composters may experience odor or unwanted pests. For that reason, place your bins away from the house. Don’t include anything that’ll attract animals, such as meat scraps, bones, fats, or dairy.
Compost bin size
One reason backyard composters fail, says Greg, is they start with a pile too small to achieve the ideal temperature of 135 to 150 degrees Fahrenheit.
He explains that because volume and mass are lost in composting, backyard piles should be larger than a cubic yard. “Even if you start with a pile that's one cubic yard, by the time you're done, if you've composted correctly, your pile should be half as big—a half a cubic yard. And that's not large enough” to reach the temperature necessary for decomposition, he says. That’s why Greg recommends composting piles be at least 4 feet square.
While bins aren’t necessary, they provide parameters that prevent everything from getting strewn around the property.
Build three bins using pallets or wire fencing to allow for ample air circulation. To keep materials from one stage of decomposition from infiltrating another pile, collect your organic material in one bin, construct your working pile in the second, and in the third, store your finished product.
Building your composting area
In the bin you’ve designated as your compost pile, spread a 3-inch layer of coarse plant material, such as sticks or branches, for aeration. Atop this, pile the organic matter you’ve collected, using 1 to 3 times the quantity of brown matter as green. However, don’t use too much: If your pile has too much carbon, it won’t get hot enough for long enough to break down, according to Greg. And too much nitrogen produces ammonia.
To accelerate decomposition, cut your materials into small pieces. Use a mulching mower over your grass clippings and fall leaves and chop veggie scraps in a blender. Water the pile as needed to keep the contents as moist as a wet sponge.
“If the particles don’t clump together and it doesn’t feel damp then it’s probably too dry,” Greg says. Simply water it with a hose.
Conversely, “if you squeeze it and water comes out of it, it’s too wet,” Greg says. Add dry organic material or soil.
During dry weather, build the sides of the compost pile higher to divert water into the center of the pile. In wet weather, build it up in the middle to encourage runoff.
Maintaining Your compost pile
The pile must reach about 140 degrees Fahrenheit for three to five days to kill pathogens and weed seeds. Done correctly, this takes about a week. Once the pile’s heated, use a pitchfork to turn everything, bringing the inside out and the bottom to the top. Allow the pile to heat again, turn, and repeat every few weeks. You can purchase a long thermometer to measure the internal temperature.
“Volunteer tomatoes (tomatoes that have started growing without you planting them) in your home compost are an indicator you didn’t compost correctly” because the pile didn’t reach a high enough temperature to kill the seeds, Greg says.
When turning, assess your pile’s needs. Bad smells or an ammonia odor means it’s too tightly packed, has too much green material, or is too wet. If needed, add more brown material and shape to allow the water to run off.
Using your compost
Your compost is ready when it no longer heats up after turning. The process takes one to five months. Finished compost is dark and crumbly with a pleasant smell.
There is no right or wrong time to apply compost to your soil. You may decide to spread 1 inch of compost over your garden bed in the fall and cover with a winter mulch. Or, apply the compost a few weeks before planting in the spring. You can also use it as a side-dressing after setting your plants throughout the growing season. To side-dress, work the compost into the soil about an inch from the stem of plants, taking care not to disturb the roots.